Have you noticed that your pond is losing water? You may discover this by detecting that the water level has gone down or there are puddles of water on the ground.
When your pond is leaking, it’s important to fix it as soon as possible. The loss of water can harm your pond’s oxygen levels, harming the fish and plants inside.
How To Identify The Cause Of Your Pond’s Water Loss
- Check Your Pipes, Filters, And Pumps First: This is the first place to check since sometimes fastenings and joints are damaged, provoking water loss.
- Check Your Pond Liner: If tiny bubbles are noticed, it is a sign of a leak underneath, and you’ll need to repair it ASAP.
- Check Pond Edges: Poor leveling during installation can make water escape at its lowest point. Liners should be installed correctly to avoid this problem.
If you haven’t been able to locate the leak, then the problem must be due to:
- Evaporation: It’s common to experience some water loss during hot weather.
- Pond Vegetation: Plants need water to survive, and the pond nearby is a perfect source.
- Splashes: They might be caused by fountain features. You must ensure water goes back to the pond and not outside.
How To Fix A Leak On The Pond Liner?
When fixing a leak in your liner, an underwater sealant is needed. If your problem is in an upper-level pond wall, then you might be able to fix that yourself also with a pond sealer. They come in different presentations as repair patches, joining tapes, adhesives, or sealants.
- Drain the water to 6 inches.

2. Remove fish and plants to a tub with pond water.

3. Clean the pond bottom and remove repair patches.

4. Pressure-wash the pond liner and let it dry.

5. Apply liquid rubber seam tape to the damaged area using a sprayer, roller, or brush. If you have an EPDM liner, clean it with acetone and then use a liquid rubber EPDM primer.
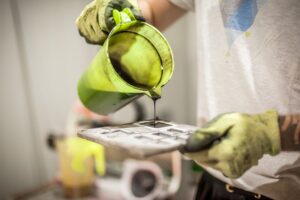
6. Ensure the coat is completely dry.

7. Apply an additional 2 to 3 coats until you achieve a 30 mil. thick membrane.

8. Allow 3-5 days for drying.

9. Refill the pond and wait 24 to 48 hours to see if there are any leaks.

10. Treat the water and put the plants and fish back in.
Now, let’s talk about repairing leaks in lower-level ponds, where the problem is less likely to be fixed because water pressure plays its part against you. It’s best to have pond contractors come in here and use a special tool called a pond slitter to cut cleanly through the liner and fix it without disturbing any rocks or plants.
Once the leak has been fixed, you should slowly refill your pond with dechlorinated water to avoid damages to your fish and plants. If there is still water coming through, then you might have a bigger problem on your hands that requires professional assistance.
Get In Touch With The Best Pond Builders in St. Louis
At Clarity Ponds, we understand your needs as a pond owner. We are here to help you design, develop and maintain your pond. We provide you with the right assistance and the highest standard of service, offering custom projects to fit every space and need.
